

 UPLOAD FILES
Trade Show Booth Setup and Takedown: How to Save Time & Stay Organized

The hard part of trade show booth setup often happens before you reach the hall. Teams lose time without a packing plan, install order, tools, instructions, clear roles, shipping details, move-in deadlines, or a teardown plan.
Speed comes from a process that removes searching, rework, missing parts, and last-minute panic. This guide follows the full cycle: plan, pack, transport, set up, inspect, exhibit, take down, and repack.
What Trade Show Booth Setup Involves
Trade show booth setup covers everything needed to make your space visitor-ready: unpacking, assembling the structure, hanging graphics, placing displays and furniture, arranging products, connecting approved equipment, organizing storage, and checking the branding. Requirements vary by booth size, display type, venue, rules, and products.
Why Trade Show Setup Runs Long
Most delays in trade show setup trace back to preparation. Parts aren't labeled, instructions stayed at the office, graphics shipped in a different box, or nobody packed the right tools. Other times the layout wasn't planned, roles are unclear, shipments arrive separately, power wasn't ordered, or a venue rule surfaces on the day.
Check the Event Rules Before You Pack
Read the official exhibitor manual first. It usually covers booth dimensions, height limits, move-in and move-out times, shipping deadlines, material handling, electrical and internet orders, hanging signs, flooring, and fire safety. Rules differ by show and venue, so confirm each one with your organizer rather than assuming.
Map Out Your Installation Order
A written sequence keeps the team from guessing. This simple trade show booth setup guide works for most exhibits:
-
Confirm the space: Check the location and dimensions.
-
Unpack and sort: Group parts before building anything.
-
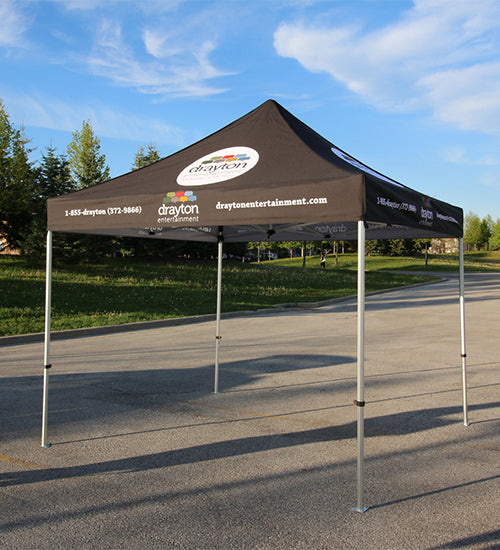
Build the main structure: Frame, custom canopy tent, display, or backwall.
-
Add graphics: Attach them carefully and straight.
-
Place large items: Counters, tables, and product displays.
-
Add products and materials: Only what visitors need.
-
Connect technology: Approved screens, devices, and lighting.
-
Inspect: Appearance, stability, branding, and visitor flow.
Pack a Dedicated Setup Kit
Keep one clearly marked kit for install day with assembly instructions, a booth diagram, a parts checklist, tape, Velcro, cable ties, labels, cleaning supplies, chargers, spare graphics, and backup hardware. Bring only the tools your display needs and the venue permits, and pack extension cords only where they're allowed.
Label Every Box and Component
Identical boxes cause endless confusion. Label structure parts, graphics, hardware, electrical items, samples, marketing materials, and technology, and number each container, such as "Box 1 of 6." For larger booths, match the numbers to your diagram.
Pack With the Next Setup in Mind
How you pack decides how easily you'll set up next time. Keep parts with their hardware, protect graphics in their own cases, separate event-day essentials, keep instructions handy, and pack the same way every time.
Trade Show Booth Setup, Step by Step
This is the core of your booth setup process.
Step 1: Inspect the Space
Check the location, size, floor, obstacles, access points, and utilities before unpacking.
Step 2: Lay Out the Components
Spread parts out so everyone sees what goes where before building.
Step 3: Build the Structure
Follow the manufacturer's instructions for your frame, canopy, or display.
Step 4: Install Graphics
Check alignment, wrinkles, orientation, and logo visibility.
Step 5: Place Furniture
Arrange tables and counters around visitor flow.
Step 6: Add Products
Show the items most relevant to this audience.
Step 7: Add Supporting Branding
Where rules allow, add custom table covers, feather flags, signs, and product messaging.
Step 8: Test Everything
Check lighting, screens, devices, QR codes, lead capture, and demos.
Step 9: See It as a Visitor Would
Walk past from the aisle. Can you tell who you are, what you offer, and where to engage?
Choose a Booth That's Easier to Set Up
Setup speed starts when you choose the booth: part count, assembly complexity, how graphics attach, transport, storage, team size, and clear instructions. A simpler configuration means fewer decisions, though real time still depends on the display, booth size, venue, and team. For larger outdoor footprints, a 10x20 canopy package keeps the structure as one system.
Give Everyone a Setup Role
Clear roles stop people from waiting around or doing the same job twice.
|
Role |
Responsibility |
|
Setup lead |
Runs the overall installation |
|
Structure lead |
Builds the frame or display |
|
Graphics lead |
Hangs and checks graphics |
|
Product lead |
Arranges products and samples |
|
Technology lead |
Handles devices and connections |
|
Logistics lead |
Manages boxes, supplies, and storage |
Small teams can combine roles, as long as everyone knows their job before the first box opens.
Do a Final Walk-Through Before Doors Open
Setup isn't done until the booth is ready for visitors.
-
Visual: Logo visible, graphics straight, packaging hidden, messages readable, products tidy.
-
Functional: Screens on, QR codes tested, devices charged, demos and lead capture working.
-
Visitor experience: Clear entrance, organized staff area, room to talk, open path, visible call to action.
Plan Your Booth Takedown Before the Show
Trade show booth takedown is the second half of setup, yet it's often rushed. Before opening day, confirm move-out time, carrier details, packaging, venue procedures, and who does what.
Trade Show Booth Setup and Takedown: The Reverse Process
A clear trade show booth setup and takedown routine means you leave as organized as you arrived.
-
Close the booth: Secure customer materials, devices, and personal items.
-
Collect small items: Devices, chargers, literature, samples, giveaways, and hardware.
-
Disconnect technology: Shut down and pack equipment safely.
-
Remove graphics: Handle them carefully and pack them for their material.
-
Take apart the structure: Follow the instructions instead of forcing parts.
-
Repack by component: Return everything to its labeled box.
-
Sweep the space: Make sure nothing is left behind.
-
Confirm shipment: Check packages, destination, carrier, and paperwork.
Time-Saving Tips for Setup and Takedown
Small habits before and after each show add up to faster installs.
-
Pre-assemble or test components before the event where the system allows.
-
Draw a booth diagram showing where each major piece goes.
-
Number boxes in the order you'll open them.
-
Keep an "open first" box with essentials on top.
-
Photograph the finished booth as a reference for next time.
-
Keep a reusable checklist and update it after each show.
Common Trade Show Setup Mistakes
Most setup problems are easy to prevent:
-
Skipping the exhibitor manual or missing move-in times
-
Unlabeled boxes and missing hardware
-
Crooked or damaged graphics
-
Placing furniture before planning visitor flow
-
Visible packaging and no storage plan
-
Untested technology and QR codes
-
No takedown plan, leftover equipment, or packing without an inventory
Trade Show Booth Setup Checklist
Save this trade show booth setup checklist for your next event.
Before you leave
-
Confirm booth size, setup time, and shipping details
-
Review the exhibitor manual
-
Prepare the booth diagram and assign roles
-
Label boxes and pack graphics, hardware, and tools
-
Test technology and prepare lead capture
During setup
-
Inspect the space and organize components
-
Assemble the structure and install graphics
-
Place furniture and arrange products
-
Connect and test technology
-
Remove packaging and do a final inspection
During takedown
-
Secure valuables and collect small parts
-
Disconnect technology and remove graphics
-
Disassemble and repack by component
-
Complete the inventory and confirm shipment
-
Check the space before leaving
Plan a Setup That Works From Start to Finish
The easiest booth to manage is planned for its whole life. When you choose a canopy, display, graphics, or tent accessories, think about design, assembly, transport, storage, and takedown from the start. Express Canopy can help you build a setup that's easy to pack and easy to show.
Frequently Asked Questions
Quick answers to common questions from first-time exhibitors.
Can one person set up a trade show booth alone?
It depends on the display. Small tabletop displays may be manageable alone, but larger structures and canopies are safer with help.
Do I have to hire the venue's labor to set up my booth?
Some venues require their own or union labor for certain tasks, such as electrical work or large exhibits. Your exhibitor manual lists what you can do yourself.
Can I set up my booth the day before the show?
Only during the organizer's official move-in window. Many shows offer setup the day before, but times vary, so book your slot early.
What if my booth shipment doesn't arrive?
Contact the show's freight desk with your tracking details, and work from your backup kit meanwhile.
Is it safe to leave my booth overnight?
Halls are usually secured, but take laptops and valuables with you or lock them away.
How should I store my booth between events?
Dry fabric graphics and canopies fully, check for damage, and store everything in labeled cases somewhere cool and dry.
How do I know if my booth setup is ready before doors open?
Stand in the aisle and check that branding shows, technology works, packaging is hidden, and the entrance is clear.